iPhone Storage Woes, App Tips, and Mexico City Vlog Update
James Yang
6/8/20255 min read

One of the things I love to do in my spare time is poking around apps and uncovering small tech hacks that make life a little easier. That curiosity came in handy recently when I hit my iPhone’s storage limit. What started as a minor annoyance turned into a full-on mission to free up space, and somewhere down a Reddit rabbit hole, I came across a surprisingly useful trick that actually worked. I also discovered some new features on Instagram and Google Maps that I think more people should know about. They’re simple but actually super helpful. Figured I’d round them all up here in case you’re dealing with the same things or just want to make your digital life a little smoother.
iPhone Storage: The Reckoning
I knew this day would come… I just kept pretending it wouldn’t. But here we are: my iPhone’s 256 GB of storage has finally maxed out.
If you’re like me and love documenting everything—travel snaps, food pics, selfies, random neighbourhood cats—you know how fast that storage fills up. Add in all the apps I use daily, and yeah, it was only a matter of time before my phone started waving the white flag.
The past week has been a blur of digital decluttering (in Marie Kondo fashion, of course). I went through everything: dusty old group chats, random media files, forgotten apps, and of course, the seemingly endless scroll of photos, videos, and screenshots (some of which dated all the way back to 2016). Yes, it was exhausting but also unexpectedly nostalgic. But somewhere in the middle of this purge, I noticed something odd: over 60 GB was being swallowed up by something called “System Data.”
Naturally, I went straight to Reddit and fell down a rabbit hole that led me to this article. It breaks down six ways to safely reduce that mysterious data. The last method, in particular, worked wonders. I watched my system data shrink from 60 GB to just 10 GB!
If your phone’s feeling sluggish or maxed out, I’d definitely recommend giving it a try.
Adding Music on Instagram Directly to Spotify
Lately, I’ve been stumbling across some seriously good music on Instagram. You know those moments when you’re watching a Story or scrolling through a post and the attached song that’s playing just hits. And suddenly you’re like, Wait… what is this track and why do I love it so much?
Until recently, I’d either screenshot the screen or try to memorize the song name before jumping over to Spotify to find it. A bit of a clunky process I’d say.
But good news: Instagram quietly rolled out a new feature that lets you add music directly from a post or Story straight into your Spotify Liked Songs. No more jumping between apps or trying to remember what you just heard. Just a couple taps, and it’s saved.
Here’s how it works:
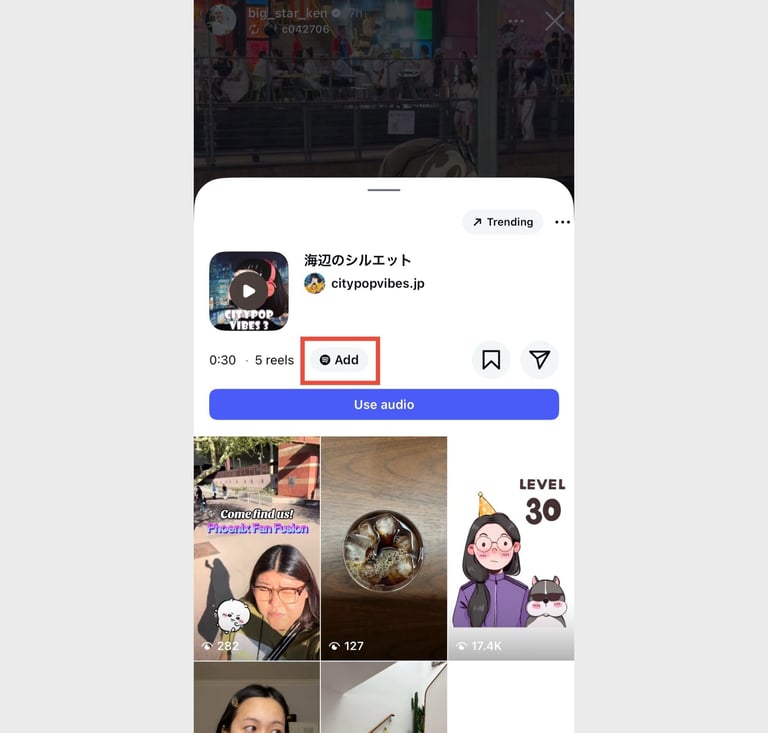
1. Hear a song you like on a post or Story? Tap the song title—it’s usually near the top of the screen.
2. Tap “View Song Details.”
3. You’ll see a little Spotify “Add” button. Tap that. If you haven’t already, Instagram will prompt you to connect your Spotify account. (It’s a one-time thing.)
4. Once that’s done, the song gets added to your Liked Songs playlist automatically.
5. Open up Spotify and voilà—it’s there.
How to Find Trending Spots in Your City Using Google Maps
If you’re anything like me and always on the lookout for new cafés, bakeries, or restaurants to check out (especially the ones that aren’t all over Instagram yet), there’s a handy little Google Maps feature you might’ve overlooked.
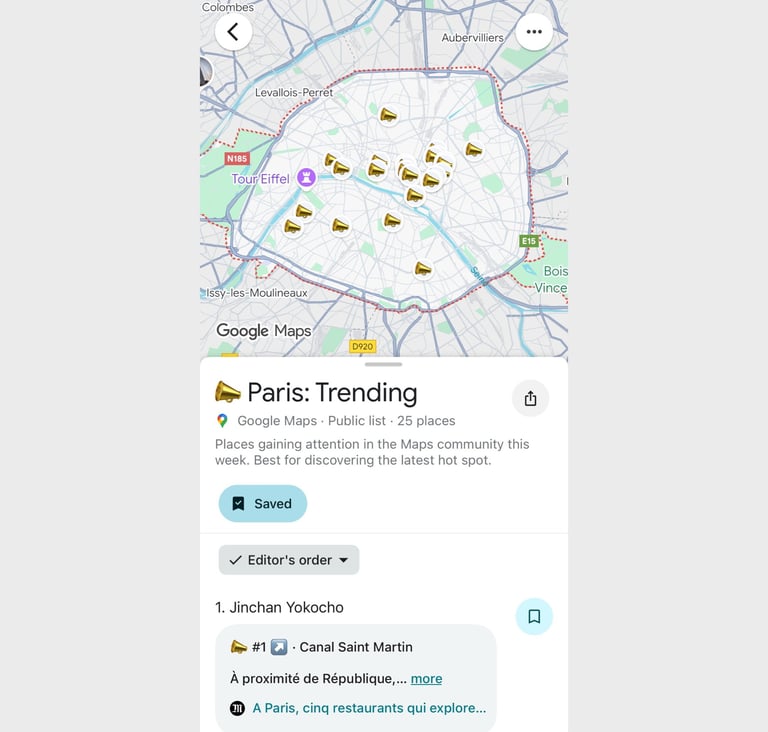
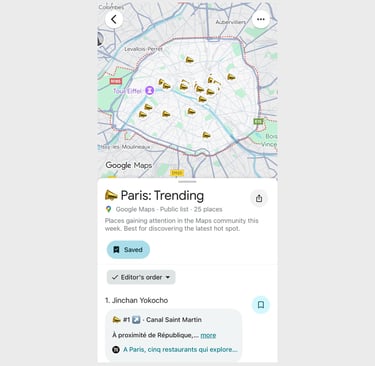
Sometime in early 2025, Google launched curated lists for major cities. These usually come in categories like “Trending,” “Top List,” and “Local Gems.” What shows up can vary depending on the city, but the “Trending” list is the one I keep going back to. It highlights spots that are currently gaining attention in the Google Maps community. The best part? The list updates pretty regularly, so it’s not just showing the same places forever.
Even better, each place on the list comes with a short description and sometimes even links to articles or write-ups about it. It saves me the trouble of Googling each place one by one just to figure out what it is and whether it’s worth checking out.
Here’s how to find it:
1. Open Google Maps (and make sure your app’s updated).
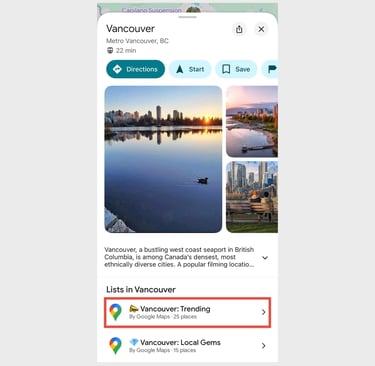
2. Type in a city, like “Vancouver” or “Paris.”
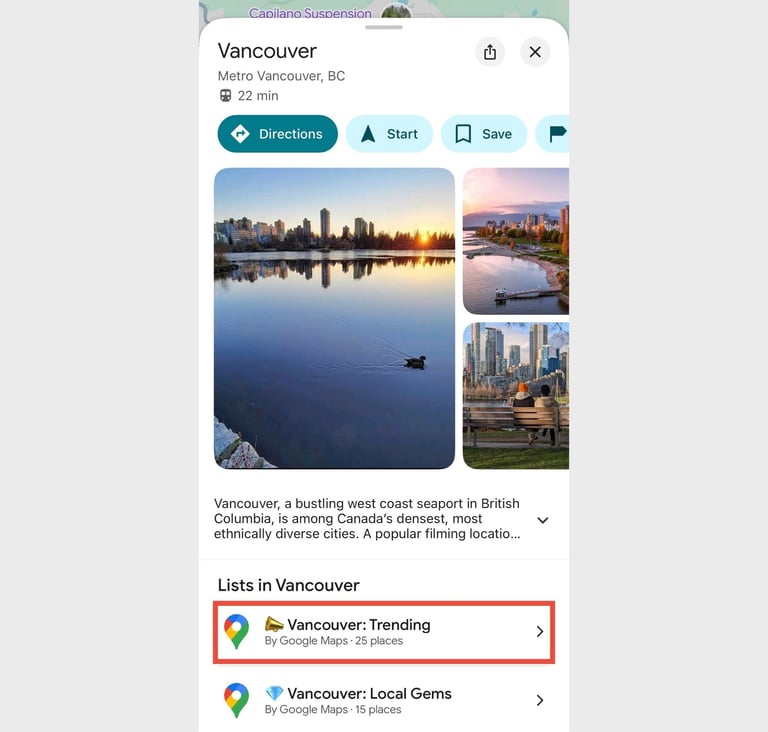
3. Scroll down the page until you see Lists.
4. Look for the one labeled “Trending” and tap it.
5. A lineup of establishments appears, complete with short blurbs and sometimes article links.
6. If you like what you see, you can save the spots that pique your interest individually or even the entire list. It’ll show up under your “Saved” tab, and all the locations will be neatly mapped out for you.
Mexico City Vlog Is Coming
If you’ve been following along on Instagram or Substack, you probably know I just got back from Mexico City. I’ve already shared some early impressions—photos, quick clips, and a few thoughts—but there’s more to come.
Right now, I’m in the early stages of editing my very first long-form travel vlog that’ll eventually be posted on my YouTube channel. I filmed everything on the DJI Osmo Pocket 3 and ended up with close to three hours of footage. More than plenty to work with.
The question is: should I post it as one long, immersive vlog or split it into three shorter episodes (around 20 mins each)? I’m inclining towards the latter but genuinely haven’t undecided.
Since it’s my first time making a vlog like this, I’m figuring it out as I go. Learning how to do voiceovers, piecing together the story, trying not to get lost in the editing timeline, and hunting for the right music that matches the vibe. It’s been a bit of a process—but a fun one.
Anyway, thanks for reading and see you in the next one!